How to Install an HVAC Surge Protector
HVAC surge protectors are one of those simple add-ons that punch well above their weight. A single voltage transient from a nearby lightning strike, a downed utility line, or a routine grid switching event is more than enough to fry a contactor coil, kill a control board, or take out an inverter drive, turning a quick service call into a costly callback. Installing a properly sized SPD at the disconnect takes about 15 minutes when done right, and on inverter-driven equipment it’s quickly becoming a warranty requirement rather than an upsell. Here’s how to do it cleanly, plus what every tech should understand about how these devices actually work.
Cut power at the main breaker feeding the condenser, then pull the outdoor disconnect. Apply lock-out/tag-out. Verify zero voltage at L1-L2, L1-ground, and L2-ground with a calibrated meter before opening any covers. Don’t trust the disconnect alone, verify.
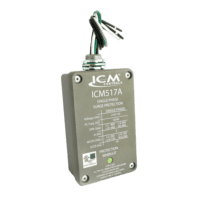
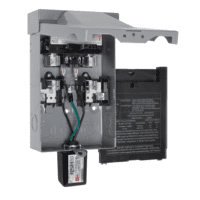
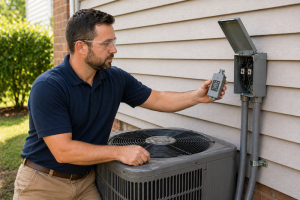
Open the disconnect (or the air handler’s control compartment if you’re installing an indoor unit) and confirm there’s room to mount the device. Most hardwired SPDs (the ICM493/494, Ditek 2MHLP120, Diversitech HSP-D, Intermatic AG2401) are sized to fit standard knockouts on fused or non-fused disconnects.
Thread the SPD’s nipple through an available ½” or ¾” knockout. Choose a bottom or side knockout to keep water from sitting at the seal. Tighten the locknut and use a sealing washer outdoors to maintain the disconnect’s NEMA 3R rating. If you have to drill a new knockout, deburr it and use a proper bushing.
Tie the black and red leads to the line side of the disconnect (L1 and L2). Never wire to the load side. You’ll lose protection any time the disconnect is pulled for service. Bond the green ground lead to the disconnect’s grounding lug or to the bare/green conductor in the whip. For three-wire models, land the white neutral on the panel or service neutral.
Keep the leads as short and straight as physically possible. Excess wire coiled inside the box adds series inductance, and inductance is the enemy of fast clamping during a sub-microsecond transient.
Restore power at the disconnect, then close the breaker at the panel. The green protection LED should illuminate within a few seconds. A red, amber, or extinguished LED means either the MOVs have already absorbed a surge or the unit is miswired. Pull power and recheck before walking away.
Apply the manufacturer’s sticker to the disconnect cover, or label the unit with the install date, model, and your company info. File the SPD serial number with any extended warranty paperwork. Check OEM warranty documentation. Many manufacturers of inverter and communicating equipment are now recommending or requiring SPD installation for full warranty coverage. Don’t leave that money on the table.

A surge protector doesn’t stop lightning — it sacrifices its MOVs so the customer’s compressor doesn’t have to.
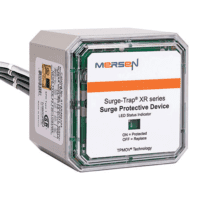
UL 1449 categorizes SPDs by where they’re installed: Type 1 (line side, before the main breaker), Type 2 (load side — what almost every HVAC-specific SPD is), and Type 3 (point-of-use). HVAC-rated devices clamp transient overvoltages and dump the excess energy to ground through metal oxide varistors (MOVs). The Voltage Protection Rating (VPR) varies by product and protection mode, typically 700V–1,200V L-L for residential HVAC SPDs. Better units also protect across L-N and L-G modes, which matters on three-wire inverter equipment with a neutral.
Three specs actually matter when you’re picking a unit. Surge current rating (in kA) tells you how much current the device can shunt to ground in a single event. Joule rating tells you how much energy it can absorb cumulatively. Response time (under 25 nanoseconds is the benchmark for MOV-based SPDs) tells you how quickly it clamps. A 50 kA device with 800–1,000+ joules of energy absorption is a solid baseline for residential split systems; mini-splits, modulating gas furnaces, and high-end inverter heat pumps benefit from a higher-rated device.

Inverter-driven and communicating systems are dramatically more sensitive to voltage transients than legacy single-stage equipment. A 200-joule spike a 1990s contactor would shrug off can permanently damage an ECM blower module, an EEV driver, or a variable-speed control board. As the industry shifts toward inverter compressors and communicating thermostats, surge protection has moved from “nice to have” to “non-negotiable.”
© Copyright 2026. All Rights Reserved.