How to Replace a Condenser Fan Motor

A failed condenser fan motor will shut down cooling fast and if it’s not caught early, the compressor follows. Replacing the motor yourself typically costs $100–$250 in parts versus $400–$700 for a service call, and for a contractor or capable DIYer with basic hand tools and electrical knowledge, it’s a same-day repair.
Grinding or humming without spin, warm air from the supply registers, or a compressor tripping on high-pressure lockout all point to the outdoor fan. But don’t pull the motor until you’ve ruled out two faster fixes.
A failed run capacitor is the most common reason a condenser fan motor won’t start. If the motor hums but won’t turn, or turns only when you give the blade a manual nudge, the capacitor is the likely culprit not the motor itself. Test it with a capacitor meter. A reading more than 10% below rated microfarads means it’s due for replacement. A capacitor costs $10–$30. A motor costs ten times that.
If the thermostat is calling for cooling and 240V is reaching the contactor, but the fan still won’t engage, check whether the contactor is pulling in. A stuck or pitted contactor can interrupt the circuit entirely. Swap it before condemning the motor.
For a definitive call, test resistance across the motor terminals with a multimeter. An OL (open loop) reading across the main power wires when the motor is cool means the internal windings are broken, and replacement is the only fix. A motor that’s excessively hot to the touch, smells burnt or has a blade that won’t turn by hand (with power off) is also done.
")
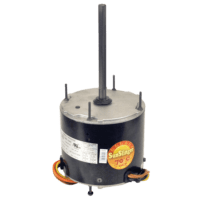
Pull the data plate off the old motor before ordering anything. You need to match all five specs:
OEM motors are a direct swap but often require waiting on shipping. Universal motors from brands like Rescue or Titan are available same day at most supply houses and cost less but demand close attention to the wiring diagram. A correctly matched motor running at proper RPM keeps that load where it belongs.
Browse condenser fan motors at to find OEM and universal options by frame size and HP.
Shut down at the thermostat, flip the breaker, and pull the disconnect block at the outdoor unit. The capacitor still holds a charge. Short the terminals — Common to HERM, then Common to FAN — using an insulated-handle screwdriver before touching any wires.
Remove the top grille screws and lift the grille with the motor attached. Flip the assembly upside down and rest it on the unit frame. Photograph every wire connection before disconnecting anything. Disconnect the motor leads from the contactor and capacitor terminals.
Loosen the set screw and expect resistance, the hub almost always oxidizes onto the shaft after a season or two outdoors. Use a fan blade hub puller rather than prying; aluminum blades bend easily and an unbalanced blade will wear out the new motor’s bearings fast.
OEM Motor: wire it one-for-one using your photos. Universal motor: follow the diagram printed on the motor housing, not memory.
Install the new run capacitor at the same time. It’s a $15–$30 part and the single most common reason a new motor fails early.
Slide the rain shield (slinger ring) onto the shaft before the fan blade. It spins water away from the bearings, skip it and you’ll be back out here next season. Seat the blade at the same depth as the old motor, tighten the set screw against the shaft flat, and torque the mounting bolts enough to eliminate vibration.
Power the unit on and call for cooling before securing the grille. Condenser fans pull air in through the side fins and push it straight up and out the top. If air is blowing out the sides, the motor is spinning backward. Power down, discharge the cap again, and swap the two rotation-reversing leads (usually orange or yellow quick-disconnects on universal motors). Reverse is a two-minute fix when the unit is still open. It’s a full disassembly job after you’ve buttoned it up.
")
Keep the area around the condenser clear of debris and overgrowth. A restricted airflow path forces the motor to work harder, raises operating temperature, and shortens bearing life. Check fin condition and clean with a fin comb or low-pressure rinse at the start of each cooling season.
If the replacement motor has sealed bearings, most modern units do, leave them alone. Oiling sealed bearings introduces contamination and shortens their life. Non-sealed motors with exposed oil ports take 3–4 drops of SAE 20 non-detergent oil annually, applied at the ports near the top and bottom of the casing.
A correctly installed motor with a fresh capacitor should run 8–12 years under normal conditions. The ones that fail early almost always come down to a mismatched spec, a reused capacitor, or a restricted condenser.
© Copyright 2026. All Rights Reserved.