HVAC Capacitor Testing: How to Get Safe & Accurate Results
A humming outdoor unit with a fan that won’t spin is one of the most common summer service calls, and one of the cheapest fixes when you catch it early. A failed run capacitor is usually the culprit, and a replacement part typically costs $15–$30. The average service call to diagnose and swap one runs $250–$350. Knowing how to test it yourself keeps that money in your pocket.
Flip the AC breaker in your main panel to the off position, then pull the disconnect block from the small weatherproof box mounted near the outdoor condenser. Both steps are required. The breaker kills the main feed, the disconnect block ensures the unit is fully isolated. Don’t skip the disconnect. Some units have a delay relay that can re-energize a circuit unexpectedly.
Tools you’ll need:
")
Before you pull out the meter, look at the capacitor. It’s the silver cylinder inside the service panel, usually mounted against the side wall.
Two visual signs tell you it’s dead without any testing:
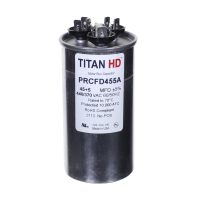
If either is present, skip the meter test and order the replacement. Match the voltage rating (370V or 440V) and the MFD rating printed on the label exactly.
")
A run capacitor holds a charge even after power is disconnected. A dual-run cap rated at 370V or 440V can deliver a significant jolt if you bridge the terminals accidentally. Discharge it before handling.
To discharge safely:
Once all combinations have been bridged, the cap is safe to handle and disconnect.
")
A dual-run capacitor has three terminal clusters stamped into the top:
A start capacitor only has two terminals (no FAN) and only services one motor. If you’re working on a dual-run cap, the MFD rating on the label is a split value, something like 45/5 µF. The larger number (45) is the compressor side; the smaller (5) is the fan side.
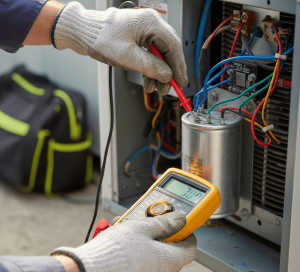
Set your multimeter to the capacitor or MFD symbol (looks like —||—). Some meters auto-range; others require you to select a range that covers the rated value.
Test procedure:
Compare each reading against the label. Apply the 6% rule: the actual reading can be up to 6% above or below the rated MFD and still be considered acceptable. For a 45 µF rating, the acceptable range is 42.3–47.7 µF. A reading below 42.3 µF means the cap is weak and will struggle to start the compressor under load, especially on hot days.
If the screen shows O.L. (Open Loop), the internal circuit is broken. The cap is dead regardless of what it looks like visually.
A capacitor that passes the bench test isn’t always the whole story. If the readings are within spec but the fan still won’t turn, the motor itself is likely the problem.
With power disconnected, use a wooden dowel or non-conductive stick to manually nudge the fan blades. If they don’t move freely, the motor bearings have seized. A good cap can’t spin a locked motor. At that point you’re looking at a motor replacement, not a capacitor swap — a different cost conversation with the homeowner.
High ambient temperatures can also cause a borderline cap to fail under load even when it tests within tolerance on the bench. If everything checks out electrically and mechanically but the system still struggles on the hottest days, a load test under operating conditions is the next step.
Once you’ve confirmed the cap is the failure point:
A compressor that was struggling to start on a weak cap will often sound noticeably different once a new cap is in: cleaner startup, immediate fan spin, no hesitation. That’s your confirmation the diagnosis was right.
© Copyright 2026. All Rights Reserved.