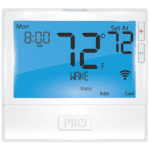
Wireless Thermostats
Wireless thermostats offer a convenient, efficient solution for HVAC systems where traditional wiring is limited or unavailable. Ideal for retrofitting older systems or upgrading to smart home technology, wireless thermostats use advanced communication through an Equipment Interface Module (EIM) to send reliable signals between the thermostat and HVAC equipment without needing direct wiring. These innovative devices make installation simple and allow for greater flexibility in thermostat placement, helping you achieve better comfort control without extensive rewiring.
Categories


Showing all 16 resultsSorted by popularity
-
MSRP: $187.14You save 13%


Explore our selection of top-rated wireless thermostats from trusted brands like Honeywell, Pro1, and more. With user-friendly interfaces, smart connectivity options, and energy-saving features, these wireless thermostats are designed to meet the demands of modern homes and businesses. Whether you’re looking for remote access, zone control, or energy-efficient temperature management, our range of wireless thermostats provides a seamless upgrade for any HVAC setup.
Popular Picks (Kits vs. Thermostat-Only)
All-In-One Wireless Kit (Programmable): Honeywell FocusPRO YTH6320R1001 — includes the TH6320R1004 wireless thermostat, THM5320R1000 EIM, and a return air sensor. It communicates via RedLINK for rock-solid reliability. Great for full wireless conversions and thermostat relocations.
Thermostat-Only (add to existing EIM or TrueZONE): Honeywell TH6320R1004 — wireless FocusPRO thermostat. It requires an EIM or Honeywell HZ432/HZ322 panel (use THM4000R1000 wireless adapter for zoned operation). Ideal when the equipment module is already in place.
Honeywell T10+ Pro Smart THX321WFS3001W — RedLINK 3.0 smart stat with indoor sensor; requires an EIM or TrueZONE wireless adapter for wireless-to-equipment setups.
Honeywell VisionPRO 8000 TH8321R1001 — RedLINK thermostat with dehumidification control; pair with an EIM/TrueZONE when going wireless-to-equipment.
Honeywell VisionPRO 8000 TH8320R1003 — RedLINK thermostat; use with an EIM/TrueZONE for wireless-to-equipment.
All-In-One Wireless Kit (Non-Programmable): Honeywell YTH5320R1000 — non-programmable FocusPRO kit with EIM and return air sensor. Simple, durable solution for light commercial and rental properties.
Thermostat-Only (Non-Programmable): Honeywell TH5320R1002 — wireless FocusPRO 5000; requires EIM or TrueZONE. It's compatible with RedLINK accessories.
Room-By-Room Comfort with Wireless Sensors: Pro1 T755WHO Wireless Universal System — add PROsync™ wireless remote sensors to balance hot and cold spots. Up to 2H/2C conventional or 4H/2C heat pump, battery or 24V power. Pair with the R751WO wireless sensor.
App-Controlled Value Smart Stat: Google Nest Thermostat (GA02180-US) — control from anywhere in the Google Home app with energy-saving features and system care alerts.
How to Quicky Choose the Right Stat
- Kit or Thermostat-Only? Pick a kit if you need a wireless bridge (EIM) and sensor out of the box. Choose thermostat-only when an EIM/TrueZONE is already installed.
- System Type & Stages: Verify conventional vs. heat pump and staging (e.g., up to 3H/2C conventional or 5H/3C heat pump on select models).
- Accessories & Sensors: For multi-room comfort, add wireless room sensors (Pro1 PROsync) or RedLINK accessories (outdoor sensor, internet gateway) as needed.
Need a hand matching parts? Share with us your system type, staging, and whether you already have an EIM/TrueZONE panel—we’ll point you to the exact wireless setup.
Call 1 (844) 727-8748 or email at customer.service@jacksonsystems.com
Replacing a Wired Thermostat with a Wireless Thermostat Kit
This guide walks you through replacing a conventional, hard-wired thermostat with a wireless thermostat kit—specifically one that uses RF communication to an Equipment Interface Module (EIM) installed at the furnace or air handler.
Step 1: Select the Right System Approach
Wireless thermostat solutions fall into two categories:
- True wireless-to-equipment kits: These include a battery- or low-voltage-powered thermostat that communicates via RedLINK (or other RF protocols) with an EIM mounted at the HVAC system. No control wires are required at the thermostat location.
- Wi-Fi smart thermostats (e.g., Nest, ecobee): These still require existing wall wires to control HVAC equipment and are not suitable when the goal is to eliminate wall cabling.
Best Choice for Cable-Free Installs: Use a wireless thermostat kit that includes a compatible EIM based on system type (conventional, heat pump, number of stages, and IAQ features).
Step 2: Verify System Compatibility (5 Key Checks)
- System Type: Identify if it’s conventional (gas/electric) or heat pump. Count the stages (e.g., W2, Y2). Look for an O/B terminal for heat pumps.
- Accessories: Confirm whether there’s humidification, dehumidification, ventilation, or dual fuel. Choose an EIM with the appropriate terminals.
- Zoning: If a zone panel is present, the EIM wires to the panel’s thermostat terminals, not the furnace board.
- Communicating Systems: Carrier Infinity, Trane ComfortLink, etc., require proprietary controls or adapters. Generic EIMs will not work.
- Power Availability: Ensure 24 VAC (R & C) is available from the HVAC system to power the EIM.
Step 3: Tools & Materials Needed
- Wireless thermostat + EIM kit (plus any remote/outdoor sensors if applicable)
- Multimeter
- Smartphone (for setup/app pairing)
- Hand tools and anchors
- Wire labels
- Drill (if new mounting required)
- Knowledge of O/B changeover behavior (for heat pumps)
Step 3: Disconnect and Document
- Shut off HVAC power at the service switch or breaker.
- Remove the existing thermostat. Photograph and label each wire (R, C, Y, W, G, O/B, Aux, etc.).
- If wall wiring is being abandoned, cap and insulate each wire and tuck them securely into the junction box for future use.
Step 4: Mount and Wire the EIM
- Mount the EIM on a flat, accessible surface near the HVAC control board.
- Connect R & C from the air handler to power the EIM.
- Move the system control wires from the furnace board to the EIM:
- Conventional systems: R, C, Y, W/W2, G
- Heat pumps: R, C, Y/Y2, O/B, Aux/E, G
- IAQ devices: humidifier, dehumidifier, ventilation outputs
- Secure wiring using strain reliefs and ensure neat, service-friendly routing.
Step 5: Mount the Wireless Thermostat
- Choose an interior location free from direct sunlight, drafts, vents, and exterior walls.
- Mount the thermostat base and install fresh batteries (if battery-powered model).
- Ensure the thermostat receives 24 VAC R & C if required (e.g., UWP base).
Step 6: Pair the Thermostat and EIM
- Restore HVAC system power.
- Enter pairing mode on the EIM (refer to kit manual—usually involves pressing a button until LED blinks).
- Follow the thermostat’s on-screen prompts to bind with the EIM.
- If using remote sensors (indoor/outdoor/duct), pair them now.
Step 7: Configure Installer Settings
Don’t skip these essential settings:
- System type & stage count
- O/B changeover logic (heat vs. cool energize)
- Fan control: Furnace-handled (Gas/Oil) vs Thermostat-handled (Electric)
- Balance points/lockouts for dual-fuel systems
- IAQ control outputs (humidify, dehumidify, vent)
- Aux/E behavior for heat pump backups
Step 8: Perform a Functional Test
Run each mode and confirm proper function:
- Fan (G): blower activates
- Cooling (Y/Y2): condenser engages, airflow verified
- Heating (W/W2 or Y + O/B): stages activate properly
- Aux/E Heat: responds under appropriate conditions
- Accessories: energize as expected
- Error-free cycling through all modes
Pro Tips & Common Pitfalls
- Confirm O/B Logic: Incorrect setting may reverse heating/cooling behavior.
- Fan Control Matters: Incorrect gas/electric setting can cause blower issues.
- Zoned Systems: Each zone needs its own EIM, or use the panel’s dedicated wireless kit.
- Mini-splits & Line-Voltage: Do not connect standard EIMs—use brand-specific wireless controls or interface relays.